External Integration – FortiGate
External List Integration – FortiGate Firewall
![]()
We can integrate our list of IOC in FortiGate firewall using the External Block List (Threat Feed) feature. This allows FortiGate to fetch and apply IP addresses from an external source, enabling dynamic and automated policy enforcement.
Pre-requisite
- Ensure your FortiGate device is running FortiOS version 6.2 or later.
- Host your IOC list on an HTTP or HTTPS server accessible by the FortiGate device.
- Format the IOC list as a plain text file, with one IOC address or CIDR block per line
Requirement
- Licensing Requirements.
- Format of External List
- IP List: e.g., 1.2.3.4, 192.168.1.0/24
- URL List: e.g., example.com/badpath
- Domain List: e.g., maliciousdomain.com
- List Refresh Considerations
- You can set a refresh interval (in minutes) when configuring the list
- FortiGate will automatically pull the latest version of the list based on this interval.
- The external list must not be too large — Fortinet recommends keeping it under 10,000 entries for performance.
Configuration:
-
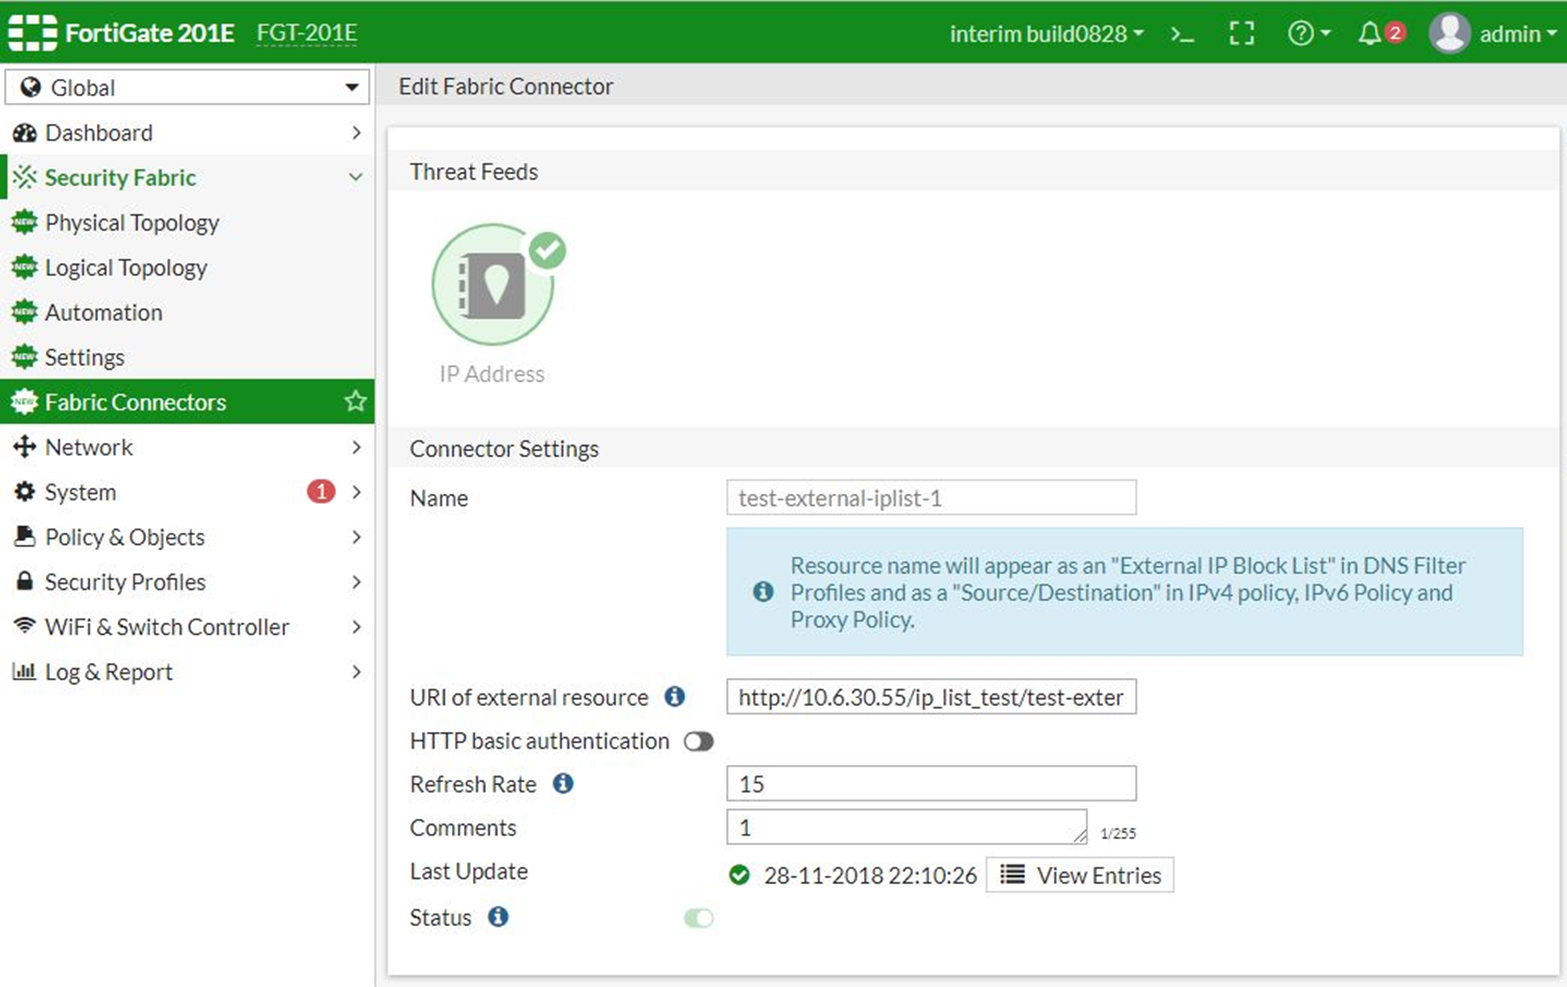
Step 1: Creating an External Blocklist Connector:
- Log in to the FortiGate GUI.
- Navigate to Security Fabric > External Connectors.
- Click Create New.
- In the Threat Feeds section, select IP Address/URL/Domain. (select appropriate type)
- Configure the following:
- Name: Assign a name (e.g., Custom_IP_Blocklist)
- URI of external resource: Enter the URL where your IP list is hosted
- To access cybercheck360 List Export section -> Export-list
- To access Cybercheck360 EDL Export section -> Export-EDL
- Adjust other settings as needed, such as refresh rate.
- Click VIEW ENTRIES to view your blocklist IOC.
-
Step 2: Apply the External Block List in a Firewall Policy (Only IP)
- Navigate to Policy & Objects > IPv4 Policy.
- Click Create New to add a new policy.
- Configure the policy settings:
- Name: Assign a name to the policy.
- Incoming Interface and Outgoing Interface: Select the appropriate interfaces.
- Source: Choose all or specify as needed
- Destination: Select the Custom_IP_Blocklist created earlier.
- Action: Choose deny to block traffic to the listed IPs.
- Configure other settings as required.
- Click OK to save the policy
For URL and Domain we need to define Usage profile path before applying in Firewall policy
Configuration for URL:
The URL filter uses specific URLs with patterns containing text and regular expressions so the FortiGate can process the traffic based on the filter action (exempt, block, allow, monitor) and web pages that match the criteria. Once a URL filter is configured, it can be applied to a firewall policy.
The following filter types are available:

The following actions are available:

-
Configuring a URL filter in the GUI:
- Go to Security Profiles > Web Filter and click Create New, or edit an existing profile.
- In the Static URL Filter or External Resources / Threat Feeds
- Add your URL Threat Feed
- To access cybercheck360 List Export section -> Export-LIST
- To access Cybercheck360 EDL Export section -> Export-EDL
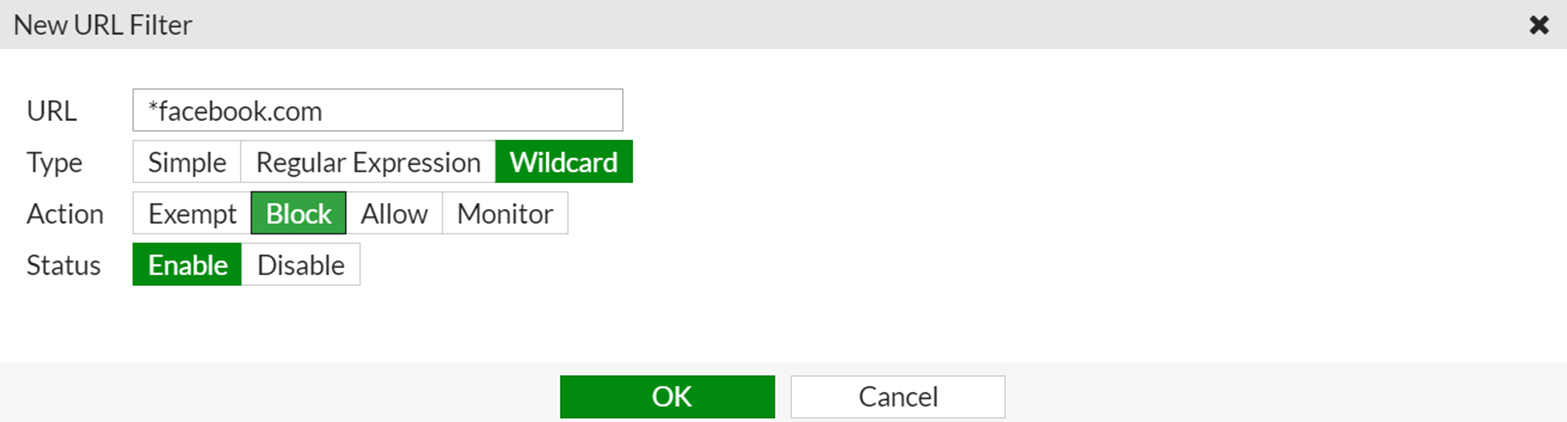
- Click OK. The entry appears in the table.
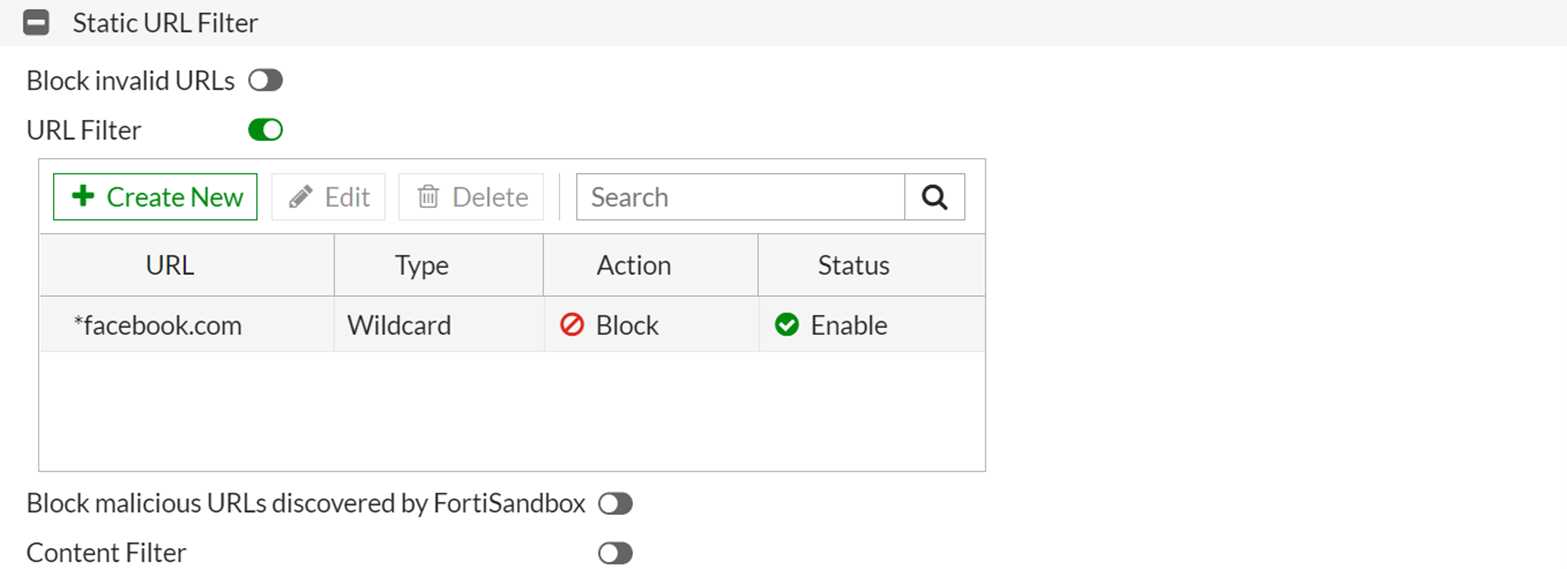
- Configure the other settings as needed.
- Click OK.
To apply the web filter profile to a firewall policy:
- Go to Policy & Objects > Firewall Policy.
- Edit a policy, or create a new one.
- In the Security Profiles section, enable Web Filter and select the profile you created.
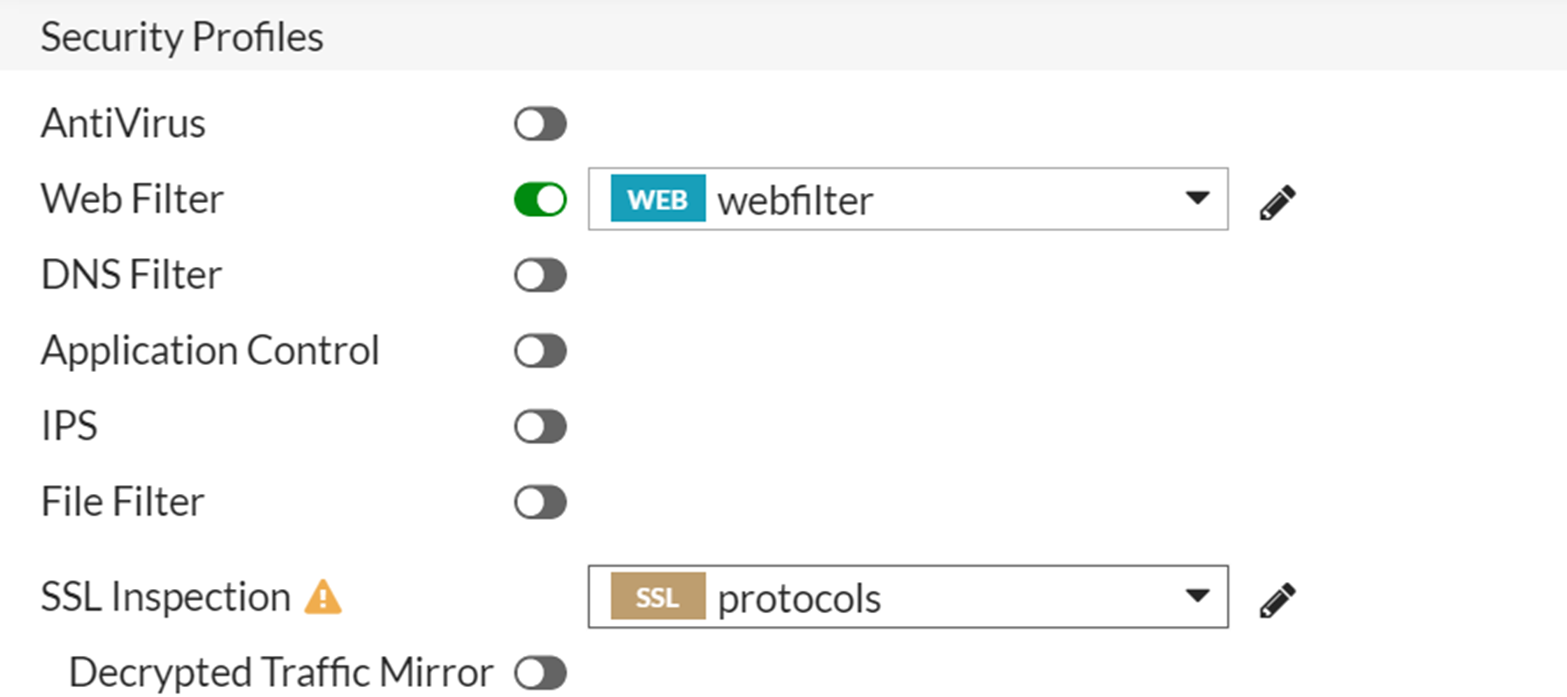
- Configure the other settings as needed.
- Click OK.
Configuration for Domain
-
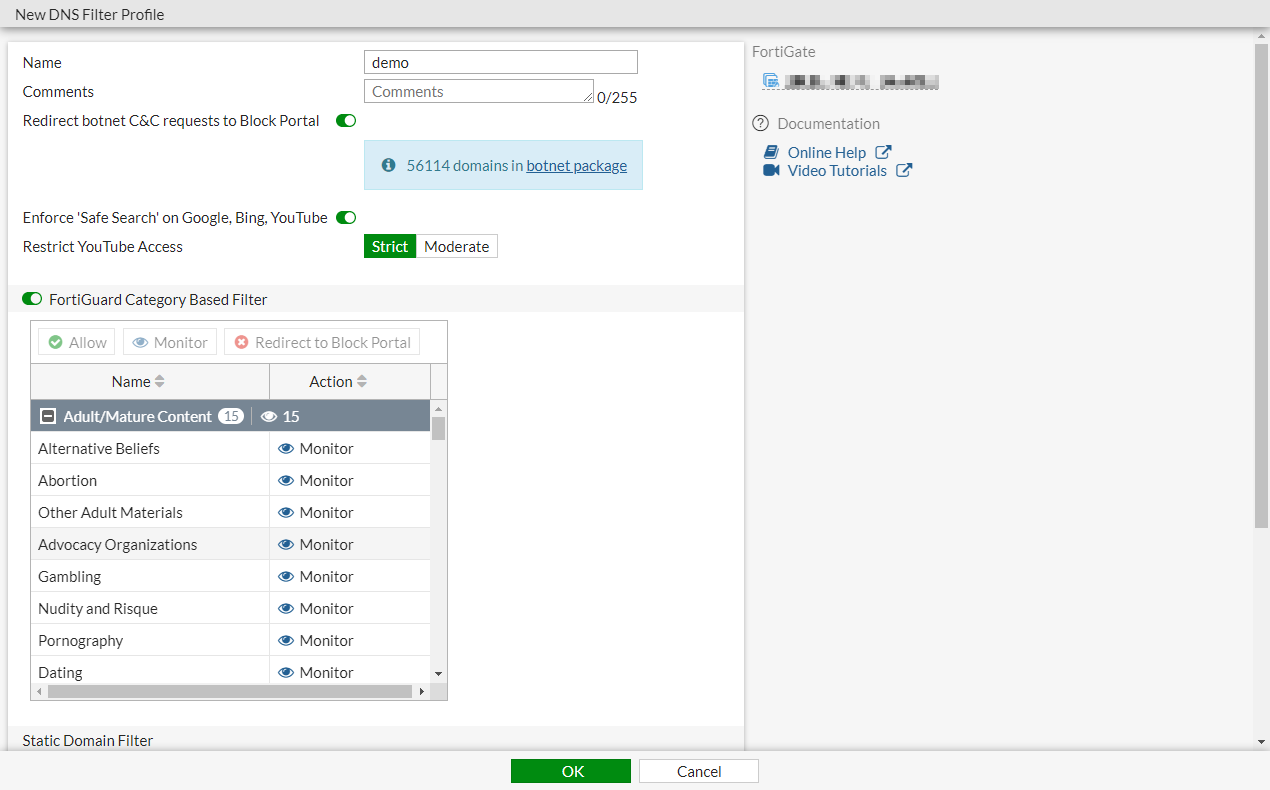
To configure DNS Filter profile in the GUI:
-
Go to Security Profiles > DNS Filter and click Create New, or edit an existing profile.
-
Configure the settings as needed.
-
Click OK.
-
-
To apply DNS Filter profile to the policy in the GUI:
1.Go to Policy & Objects > Firewall Policy and click Create New, or edit an existing policy. 2. In the Security Profiles section, enable DNS Filter and select the DNS filter.
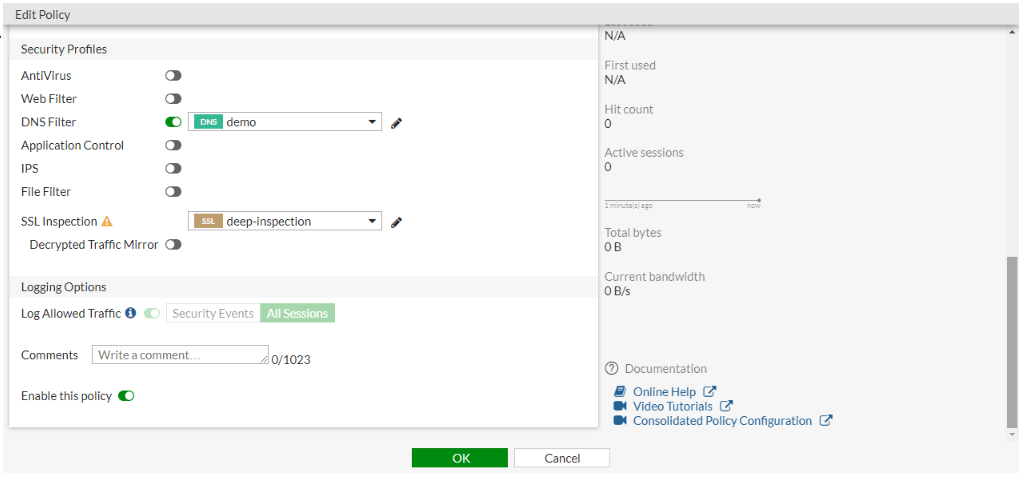
- Configure the other settings as needed.
- Click OK